At First step you will need to prepare your PC for PHP, don't worry I will teach you how.
PHP is a server side language that runs on a server PC, but you can run it on your PC at the same time as Server and Client. I will recommend you WAMP server for this.
What is Wamp Server? Well I will not go in the details (our main focus is PHP) but I will tell you a little about it because you will use it to run PHP on your PC.
"WAMP is a form of mini-server that can run on almost any Windows Operating System. WAMP includes Apache , PHP , and MySQL." Basically WAMP comes with a package of following three softwares.
1: Apache - A Web Server that serves the web requests.
2: PHP - PHP language package.
3: MySQL - Database Server.
Setting up Wamp Server locally in Windows XP
The great thing about WampServer is it makes our job easier by installing Apache server, MySQL database and PHP all at the same time. Don’t worry about installing or how these will interact with each other.
- Download the latest version of Wamp Server- as of this writing it is of Version 2.0i. (Approximately 16 MB)
- Run the setup process by double clicking the downloaded WampServer2.0i.exe file.
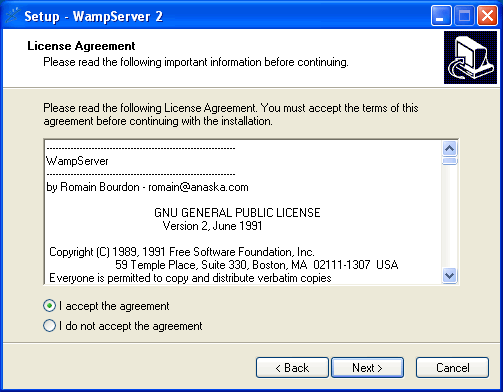
- Click on “Next” and check the radio selection “I accept the agreement” and press “Next”.
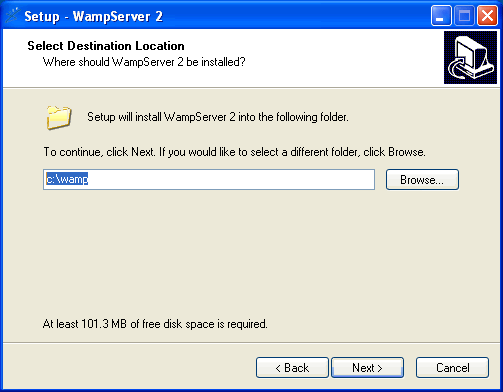
- The default path for WampServer is “C:\wamp“. You can change it if you want by clicking the “Browse” button but I do suggest you leave this in the default setting and press “Next“.
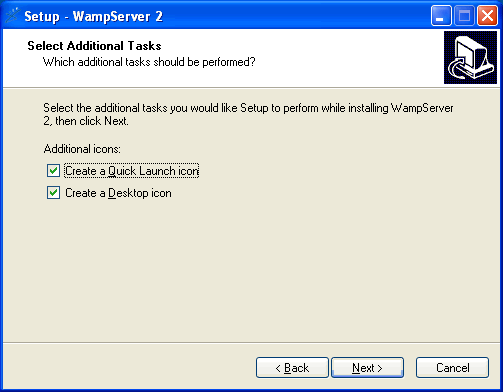
- Select both “Create a Quick Launch Icon” and “Create a Desktop Icon” and press “Next“.
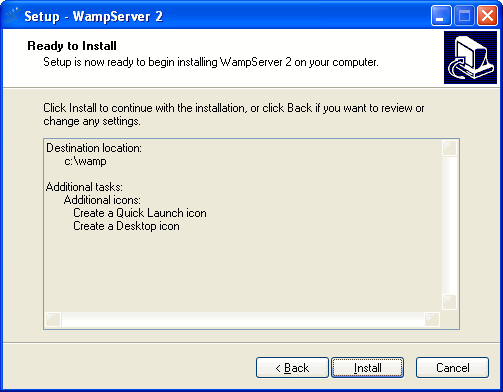
- Click “Install” to begin with the installation.
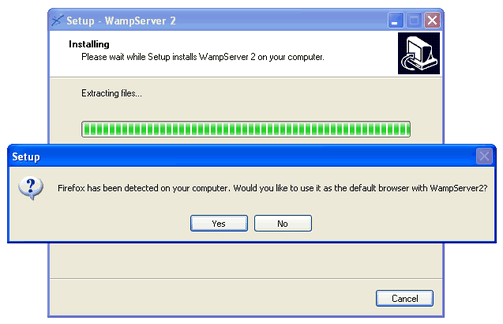
- A popup box will appear and ask you to choose your default browser. Please choose your default browser to which the wamp server will be associated. I do suggest that you use Mozilla Firefox as there are so many plugins that you can add to this browser to make your programming world become more interesting and efficient. Click “Yes” to continue.
- “Unblock” the Windows Security Alert if it asks you.
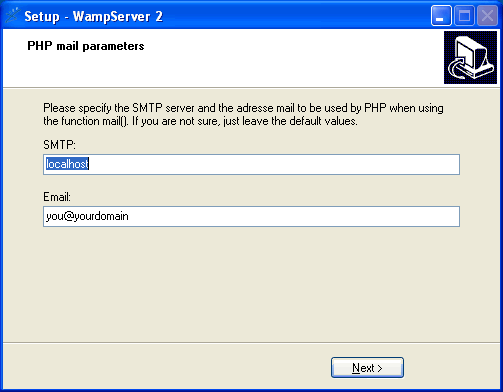
- Just leave the default values as such for the “PHP Mail Parameters” and click “Next“.
- Click “Finish” to exit the setup (Make sure that the “Launch WampServer 2 now” option is checked)
- Now you will see a “speedometer- like icon” on the notification area of the taskbar (beside your taskbar clock).


- Just wait until the speedometer is fully white (Represents its fully ready).
- If your WampServer is fully ready, you can skip the next step and continue reading “Setting Up phpMyAdmin“.
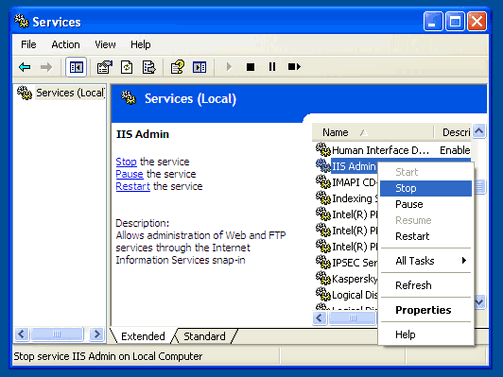
- If it is not, that means some other server service is running in the background and the service with WampServer is clashing. Most probably you have windows web server (Internet Information Services – IIS) running at the time of the WampServer installation. To solve this, we need to stop the IIS. Same things goes if you want to start IIS services, you must stop the WampServer services.
- To stop the IIS service, go to Start > Run > and type services.msc and hit the enter button. This will opens up a services control panel.
- On your right hand side, navigate and find a service called “IIS Admin“. Right click on it and select “Stop“. This will stop the IIS services.
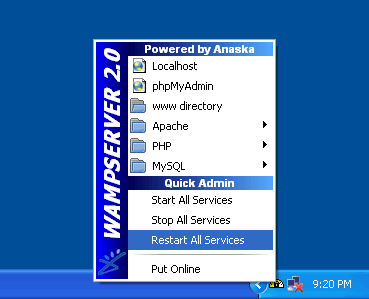
- Now you can restart your WampServer services by single clicking on the WampServer icon, and select “Restart All Services“.
- You can now see your speedometer-like icon is a full white color (Represents its fully ready).
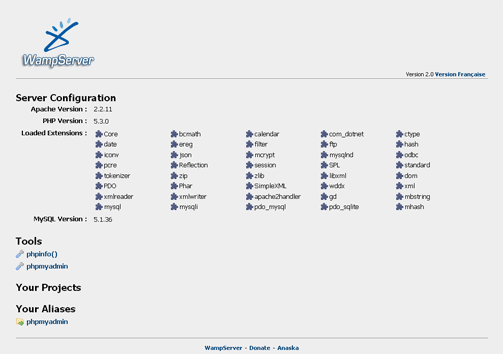
- Your Wampserver is now ready. Now open web browser and type http://localhost in the address bar this will open a welcome page of WAMP server.


No comments:
Post a Comment